How to create a Theme for Contemple
In this tutorial, i will create a simple Theme for a website wich can be managed with the Contemple app. The website will have only two pages: Home and Contact.
Let's assume to create a Theme for the website: www.yourdomain.com.
When everything is setup, an editor will be able to enter the url: http://www.yourdomain.com/cthub/ in the app to install the website on the local device and publish content with the Contemple app.
What is a Theme
A Theme, (also called Root Template), is a compressed zip file wich contains the files for the website and a few configuration files.
It is possible to create a new theme in the Contemple app to get started quickly, but for demonstration purposes, I create the theme completely from scratch.
To start, create a new directory on your hard disk with the following files:
- config.xml
- cmd.xml
- help.xml
- index.html
- contact.html
- main.css
config.xml:
The config.xml file set some properties of the Theme. It references the template files and also static files and folders.
Note: Always use a unique name for every Template. You can use the help.xml file to create a Label for the name.
File: theme/config.xml:
<ct>
<template
name = "com.yourdomain.v1"
version = "1.0.0"
type = "root"
dbcmds = "cmd.xml"
help = "help.xml"
index = "index.html"
files = "contact.html,main.css"
folders = "images"
staticfiles = ""
sortareas = "name"
sortproperties = "priority"
pagetemplates = "">
</template>
</ct>
cmd.xml
The cmd.xml file is an additional configuration file for the Theme. It contains a few command lists wich are executed on specific events (app-start, app-load and dbcreate)
The dbcreate event is used to install the Sub Templates with the CTTools subtemplate command (text, image and menu-item).
File: theme/cmd.xml:
<ct>
<appstart>
<cmd name="CTTools define-constant styleList1=left,center,right,#separator,block"/>
</appstart>
<dbcreate>
<cmd name="CTTools subtemplate template-generic:/st/text"/>
<cmd name="CTTools subtemplate template-generic:/st/image"/>
<cmd name="CTTools subtemplate template-generic:/st/menu-item"/>
</dbcreate>
</ct>
help.xml:
The help.xml file contains the Labels and translations for all Theme settings in the app.
File: theme/help.xml:
<ct>
<item name="Welcome">
<lang name="en" value="Welcome"/>
<lang name="de" value="Willkommen"/>
</item>
<item name="com.yourdomain.v1">
<lang name="en" value="Your Domain"/>
<lang name="de" value="Your Domain"/>
</item>
<item name="com.yourdomain.text">
<lang name="en" value="Text"/>
<lang name="de" value="Text"/>
</item>
<item name="com.yourdomain.image">
<lang name="en" value="Picture"/>
<lang name="de" value="Bild"/>
</item>
<item name="com.yourdomain.menu-item">
<lang name="en" value="Menu Item"/>
<lang name="de" value="Menü Eintrag"/>
</item>
</ct>
That was the configuration files.
Next are the actual website files.
index.html
The index file is the Start Page of the website.
File: theme/index.html:
#def:
Home-Page-Title:String="Your Domain | Home";
Background-Color:Color="#06F";
Font-Color:Color="#fff";
Logo-Image:Image("images","logo-new.#extension#","Image Files","*.JPG;*.PNG;")="images/logo.png";
#def;
-->
<!doctype html>
<html>
<head>
<meta charset="utf-8">
<title>{#Home-Page-Title}</title>
<link rel="stylesheet" href="main.css">
</head>
<body class="home">
<div class="main">
<div class="header">
<div class="logo"><img src="{#Logo-Image}"></div>
<div class="menu"><ul>{##Menu("ico:/link.png"):menu}</ul></div>
</div>
<div class="content">
{##Home("ico:/home.png"):content}
</div>
</div>
</body>
</html>
At the beginning there are four Template Properties defined inside the #def: ... #def; block. (Home-Page-Title, Background-Color, Font-Color and Logo-Image)
The Template Property: Home-Page-Title is used inside the <title></title> tag.
The Logo-Image is used in the src attribute of the <img/> tag. The default value is "images/logo.png". If the image is changed in the Contemple app, the name will be either "images/logo-new.png" or "images/logo-new.jpg"
The index file also contains two Template Areas: Menu and Home. (The icons, home.png and link.png, are default icons from the Contemple app and are used only inside the app)
The Menu area allows only Sub Templates of type menu. The Home area allows items of type content
Hints:
- Areas begin with two Hashtag characters (##). Areas can be filled with database items inside the app
- Template Properties can be easily edited in the Contemple app under Settings. They can be used multiple times in every Template File. (Template Files are referenced in the config.xml files attribute)
- Template Properties and Template Areas can be used only if they have been defined earlier. The order of the config.xml files attribute is important to use properties across different Template files
- The file in wich a Template Property or Template Area is defined, is also used for the Preview inside the Contemple app. Template Properties should be defined in .html files)
contact.html
File: theme/contact.html:
Contact-Page-Title:String="Your Domain | Contact";
#def;
<!DOCTYPE html>
<html>
<head>
<meta charset="utf-8">
<title>{#Contact-Page-Title}</title>
<link rel="stylesheet" href="main.css">
</head>
<body class="contact">
<div class="main">
<div class="header">
<div class="logo"><img src="{#Logo-Image}"></div>
<div class="menu"><ul>{##Menu}</ul></div>
</div>
<div class="content">
{##Contact("ico:/email.png"):content}
</div>
</div>
</body>
</html>
The contact.html file defines only one Template Property: Contact-Page-Title. But it also uses the Logo-Image property and the Menu area from the index.html file.
The Contact area allows items of type content.
main.css
File: theme/main.css:
a, a:visited { text-decoration:none; color: {#Font-Color}; }
.main { max-width:950px; margin:0 auto; background:{#Background-Color}; color:{#Font-Color}; }
.header { vertical-align:top; }
.cl { clear:both; }
.logo { display:inline-block; float:left; }
.menu { display:inline-block; float:right; height: {#Logo-Image@height}px; line-height: {#Logo-Image@height}px; vertical-align:middle; }
.menu ul { list-style: none; }
.menu li { display: inline-block; margin-left: 15px; background: {#Font-Color}; line-height:1rem; vertical-align:middle; }
.menu li:last-child { margin-right:8px; }
.menu li a, .menu li a:visited { display:inline-block; text-decoration:none; padding: 8px; color: {#Background-Color}; }
.content { clear:both; }
.content li { list-style-position:inside; }
.c-img > img { max-width:100%; }
.block { padding:25px; margin-bottom: 25px; border: 10px solid {#Font-Color}; }
.center { text-align:center; }
.left { text-align:left; }
.right { text-align:right; }
The main.css files contains the style sheet for the theme. Here the Background-Color and the Font Color properties from the index.html files are used to set style values.
The height of the Logo-Image is also used to set the height for the header
The styles: left, center, right and block can be selected as layout style in the app. (This is a very minimal theme setup with only four classes to control the layout of new items. The styles are defined in the cmd.xml)
Sub Templates
Sub Templates are code snippets wich are added as often as Database entries exist. Sub Templates are stored in the st/ directory of the theme folder.
In the theme folder, create a new directory called st.
Sub Template Text
Inside the st folder create a new directory for the first Sub Template text and create the following files:
- st/text/config.xml
- st/text/text.html
The config.xml file for a Sub Template is similar to the config.xml files of Root Templates but with some additional attributes. It also references the database table and fields, setup how the item is rendered in the item list (listlabel, listicon, parselistlabel). If parselistlabel is true, the text will be rendered with richtext markup in the itemlist.
File: theme/st/text/config.xml:
<ct>
<template
name = "com.yourdomain.text"
version = "1.0.0"
type = "content"
index = "text.html"
files = ""
listlabel = "#value#"
listicon = "ico:/pencil2.png"
parselistlabel = "true"
sortproperties = "priority"
tables = "ex_com_yourdomain_text"
fields = "name,style,value">
</template>
</ct>
File: theme/st/text/text.html:
Inside the code snippet for the Sub Templates, the properties have to be in the fields attribute of the config.xml file to setup database tables.
Sub Template Image
Inside the st folder create a new directory: image and create the following files:
- st/image/config.xml
- st/image/image.html
File: theme/st/image/config.xml:
<ct>
<template
name = "com.yourdomain.image"
version = "1.0.0"
type = "content"
index = "image.html"
files = ""
listlabel = "Picture: #image#"
listicon = "ico:/image.png"
parselistlabel = "true"
sortproperties = "priority"
tables = "ex_com_yourdomain_image"
fields = "name,style,image">
</template>
</ct>
File: theme/st/image/image.html:
{#name:Name}
{#image:Image('images','#INPUTNAME#.#EXTENSION#',"Image Files","*.gif;*.jpg;*.png;")} {#style:List(full-size,cinema,#separator,#styleList1)} -->
<div class="c-img {#style}">
<img src="{#image}" data-width="{#image@width}" data-height="{#image@height}">
</div>
In the html comment at the beginning, the type of the three database fields are defined (name, style and image). The name field is not used, but it is required to set the type Name of the field.
The style field is of type List wich allows to select an item from a popup list in the app.
The image field allows to select images in the app. It will copy the image into the project directory and also rename it to keep a certain file structure. Here the image name will be the name field and the file extension of the selected file and it will be copied to the images directory.
In the width and height attributes of the <img> tag, the dimension of the selected file is inserted.
Sub Template Menu-Item
Inside the st folder create a new directory: menu-item and create the following files:
- st/menu-item/config.xml
- st/menu-item/menu-item.html
File: theme/st/menu-item/config.xml:
<ct>
<template
name = "com.yourdomain.menu-item"
version = "1.0.0"
type = "menu"
index = "menu-item.html"
files = ""
listlabel = "#label# (#url#)"
listicon = "ico:/link.png"
parselistlabel = "false"
sortproperties = "priority"
tables = "ex_com_yourdomain_menuitem"
fields = "name,label,url">
</template>
</ct>
File: theme/st/menu-item/image.html:
The Menu Item is of type menu (set in the config.xml of the Sub Template). It can be inserted only in the Menu area.
Hint: The type of the other two Sub Templates, Text and Image, is content
The url field allows to select the link of available sub pages and some common links. Note: The @ character is not allowed in Template Property Code. Instead use the String #at#
Add the logo image
In the theme folder create the images folder and copy a logo.png into the images folder. This is the logo wich is used on the website.
Congratulation to your first Contemple Theme
Now the theme is ready to be packaged and uploaded to www.yourdomain.com.
You can download the theme files here:
Let's see if everything installs correctly in Contemple.
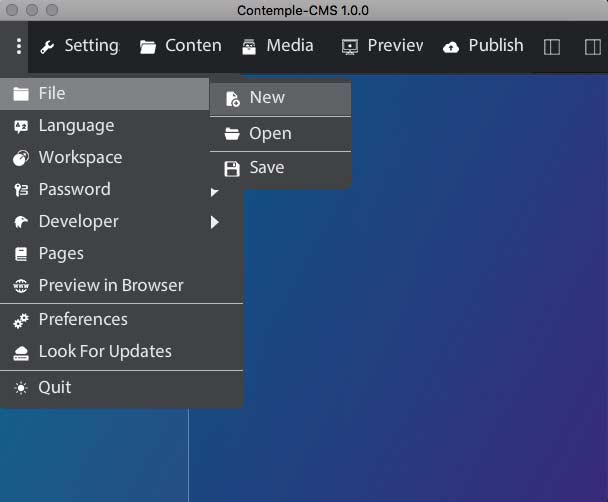
In Contemple, select New from the Menu:
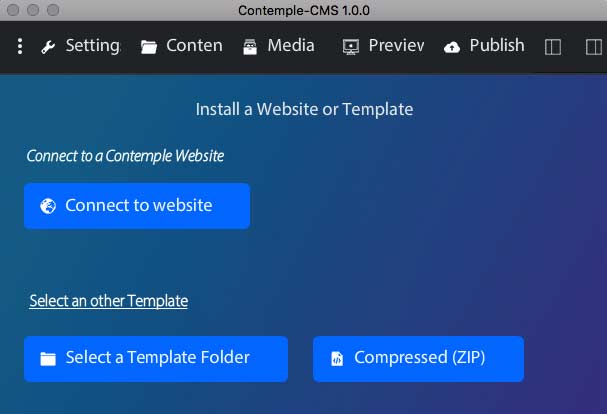
Click on Select an other Template and select the Template folder you have created.
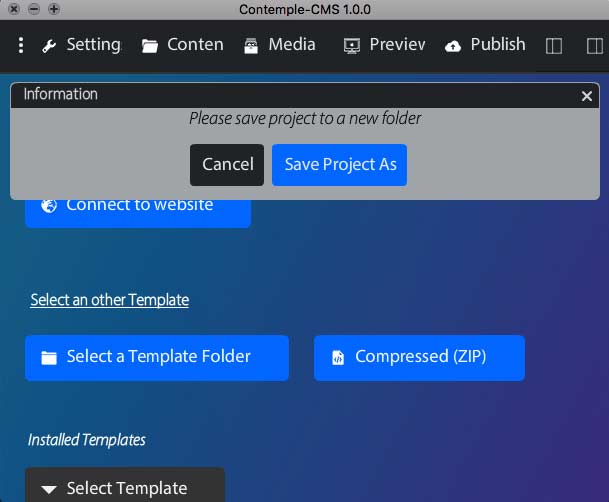
Contemple should then install the Template and ask for a folder were you want to store the local version of the website.
After the Theme is installed, you see only a empty website because there is no default content in the theme. I've skipped default content to keep the tutorial simple.
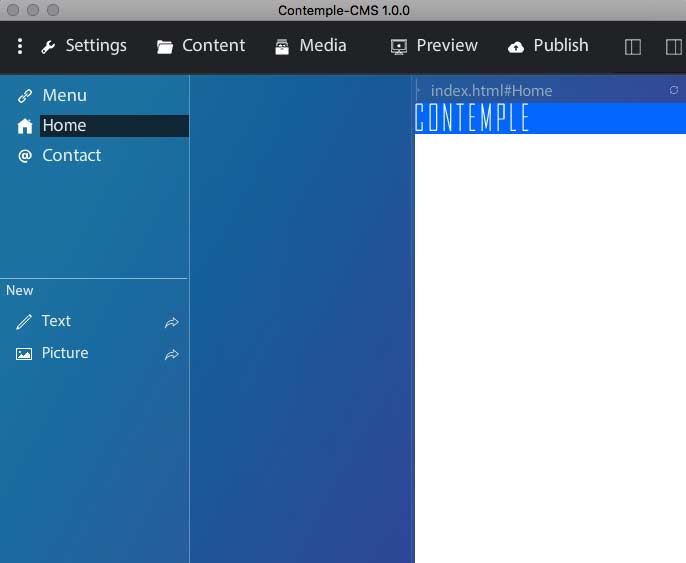
Adding some demo content manually, in the Menu and Home areas:
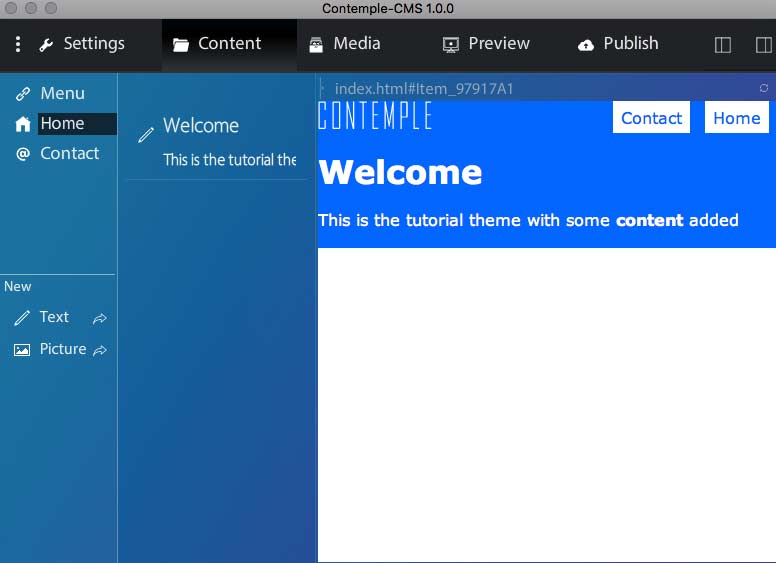
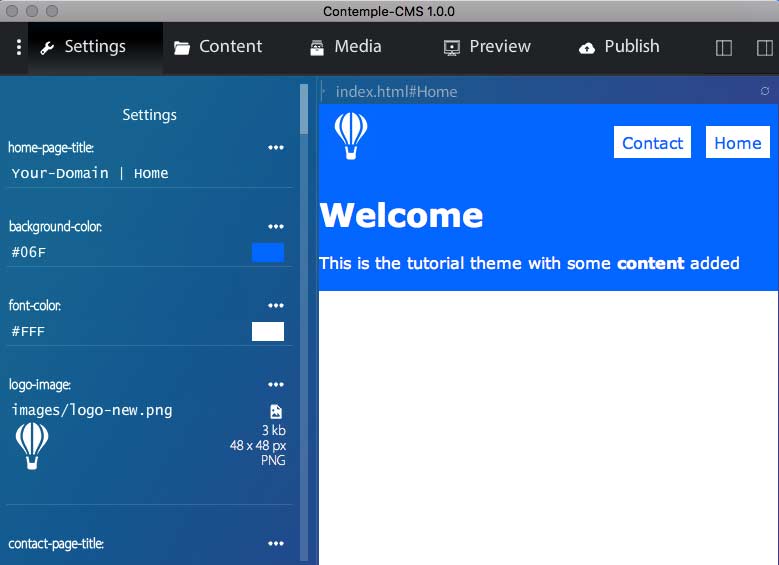
Under Settings, i've chaged the Logo image to the Balloon Icon.
Package the theme
Before packaging a Theme, set the version of the Theme in the config.xml file of the Theme.
Then select all files and folders of the theme folder and compress them into a zip file. (you can not select the theme folder for compressing)
Rename the zip file to template-yourdomain-1.0.0.zip
Download Contemple Hub
Contemple Hub is required on the server from www.yourdomain.com. Contemple Hub PHP should work well with PHP 5.3 or higher.
Download the Contemple Hub PHP version from www.contemple.app
Copy the template-yourdomain-1.0.0.zip into the cthub folder you have just downloaded.
Open the install.xml file from the cthub folder and modify the attributes to:
<ct>
<templates>
<template
name="com.yourdomain.v1"
src="./template-yourdomain-1.0.0.zip"
version = "1.0.0"
date="01-01-2020"
homeAreaName="Home"
uploadScript="https://yourdomain.com/cthub/cthub.php" />
</templates>
</ct>
In the install.xml, the paths have to point to your webserver. The src attribute contains the path to the theme package. The uploadScript attribute points to the cthub.php script wich handles the installation and publishing in Contemple
The last step is to upload the modified cthub folder to the root directory of www.yourdomain.com. Then you can install the website in the Contemple app:
For security you should copy the install.xml and the cthubp.php one hierarchy above the root directory of the website so they are not accessible without password. Then change the paths in the cthub.php file.
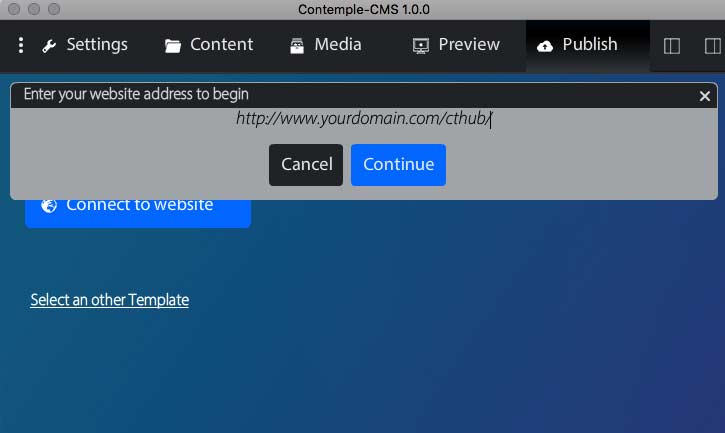
Open Contemple and select New from the menu. Click on Connect to website.
Enter the url http://www.yourdomain.com/cthub/ and click Continue:
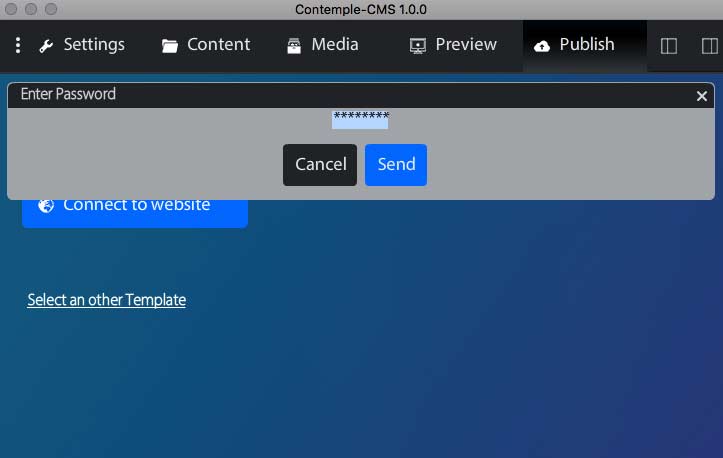
Enter the password admin if required. This is the default password set in the cthub folder.
After the Theme is installed, the app is connected to the website www.yourdomain.com. You should change the password in Contemple.
Hitting Publish will upload the local version to the webserver.
